

CS GO Autoexec: Counter-Strike: Global Offensive has been a game that has ruled the FPS scene until recently. The game has a lot to offer in terms of customization options. To perform better and have different gameplay, players have been experimenting with the CS GO settings. Even in the pro scene, you will find many top players constantly making changes to their resolution, crosshair, Video settings, Key binds, etc.
But, many of us are unaware of how to use the console to make some of these fines. But in order to make such fine-tuned changes, you need to understand the critical approach of everything. However, with the help of the CSGO console, you can make some beneficial changes. In order to access the console, you will have to press the ‘ ~ ‘ key on your keyboard. The key is pre-allocated in the CS-GO’s programming to allow access to the console when pressed.
However, to enter the special settings every time you open the game is quite annoying no one would like it. Typing or even pasting codes, every time you open the game will increase your annoyance even before you start playing a competitive game, and if you got a toxic teammate you will certainly lose your temper. So in order to keep your sanity intact, there is the Autoexec config option in the console.
What is an Autoexec in CS GO?
An Autoexec (auto-execute) is a personal configuration file that a player puts in the game’s files, that has the player’s own settings. It contains settings like crosshair re-sizing, buy binds, CS GO keybinds, sensitivity, etc. This implements these settings automatically while executing. This will prevent you from fetching the personal settings each time you open the game. Isn’t it cool to have all your personalized settings load up at once?
Here is a Wise Tip for You:
- Store your Autoexec file somewhere online too. This will allow you to have access to it anywhere you go. So maybe you are having a LAN party match and you have a different PC. You can easily fetch these settings into the game then and there. At least you will have your own settings to trust on an alien rig!
As mentioned above, make sure you have your personal config/Autoexec saved somewhere. It is possible that with a big update or in case of reset, these settings get removed.
Before we tell you how to make your own, here’s how you will be able to use the best CSGO settings.
How to Use a CSGO Download Pro Players Config | CS GO Autoexec for Pros
So, this is very simple. However, there is a prerequisite. You need to have access to a downloadable file with the settings of the pro player whose settings you want. Once you have their downloadable config file half the work is almost done.
For example, you want to have the configuration of S1mple in your game. You will need access to his config / Autoexec file. You can find it online as many of the bloggers keep a track of these CSGO settings.
Once you get the aforementioned file, you can fetch it into the CSGO folder on your PC. We will tell you how to do it step-by-step. But, before we tell you anything, we highly recommend you keep a backup of your own CSGO settings.
Steps to Add the Pro Player’s Config
- Step 1: Download the config file of the pro player, whose settings you want to try.
- Step 2: Unzip it using your unzip software (we use WINRAR).
- Step 3: Once you have the unzipped folder containing the config file; locate the Steam folder in the program files of your C drive.
- Step 4: Follow this path on your computer, Local Disk C: => Program File (x86) => Steam => userdata => YOURSTEAMID => 730 => local => cfg.
- Step 5: Copy the old cfg file in your backup folder and replace it with the new one that you downloaded.
It is Done! Now you have to open your CSGO from steam and you will find the pro player’s personal settings auto executing. Go ahead and play as much as you wish and when you are done playing in his settings don’t forget to replace your cfg file in the same folder when you are done.
How to Create & Use your Own Autoexecute | CS GO Autoexec
Creating an Autoexecute for yourself is not so tough. All you need to do is follow the right steps. Before we tell you all the steps, you will have to prep up a bit. We recommend that you download Notepad++.
This will help you in easily editing your Autoexec file once you have created it. Worried about safety, it is a safe program that is used by millions of people around the globe and has been found safe for use. Once you have installed the Notepad++, you are good to go!
Steps for Creating an Autoexec CSGO File
- Step 1: Navigate to your CS GO config folder.To do this, open your Steam and right-click on the Counter-Strike: Global Offensive game. You will find it in the list of the games that you own in steam.
- Step 2: On you have right-clicked, in the drop-down, click on Properties.
- Step 3: The property menu opens, you will find an option of “Browse Local files”. Click on it and you will be navigated to the file and folder section of the steam where the data related to the game is saved.
- Step 4: Once you are in the bank of files and folders of the steam library. Locator the “csgo” folder.
- Step 5: After opening the csgo folder, go to the cfg. Double click on it to open.
- Step 6: Now you will see numerous files and documents here. All you have to do here is look for an empty space, right-click and create a “New” => “Text Document”.
- Step 7: Since you have created the new text document, rename it as “autoexec.txt”. Now open the newly made autoexec.txt file.
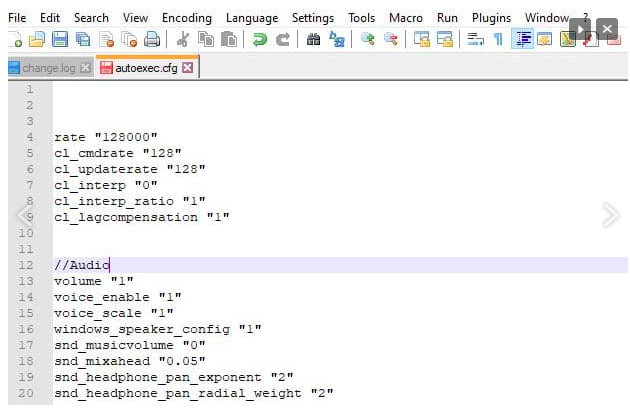
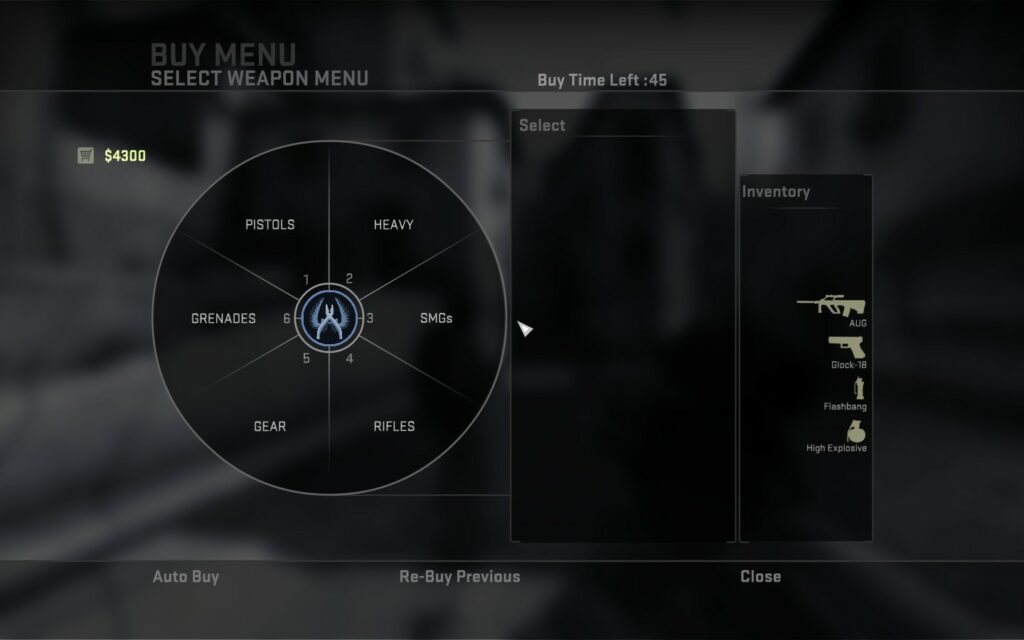
- Step 8: Once opened, in the blank space, you can write all the codes, keybinds, buy binds, mouse acceleration & configuration settings that you want to use. You can copy some important Autoexec from trusted online sources too. There are plenty of resources, maps, settings, crosshairs available online. You can even use an online Autoexec creator.
- Step 9: Now make sure to add “host_writeconfig” in your last line. Many online generators already have this.
- Step 10: Once you are done proofreading and checking that everything is correct and fine, go to the file “menu” option and navigate to the “save as” option.
- Step 11: This is a crucial step. While saving the file make sure you name it as “autoexec.cfg”. Your Autoexec file is ready and now you can launch the Autoexec file every time you open the game.
However, you will still find the old.txt file saved there. If you wish to keep it you can. It won’t make a fortune. But, if you are someone who likes clean moves, then you can go ahead and delete the file. You can always edit the autoexec.cfg with Notepad++. All you have to do to edit your cfg file is right-click in the file and select the edit with the Notepad++ option.
Now since you have your own autoexec.cfg file and you want it to load every time you open the Counter Strike Global Offensive on Steam, you will have to follow a few more steps.
Steps to Add CS GO Autoexec: Steam Launch Option Settings
- Step 1: Open steam and locate the Counter Strike Global Offensive title in the list of games you own on Steam.
- Step 2: Right-click on it and go to its properties.
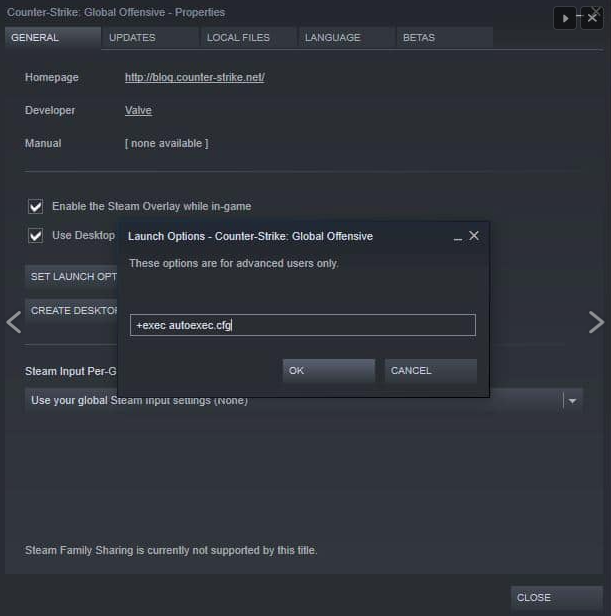
- Step 3: Locate the “Set Launch Options” and click on it.
- Step 4: Now write “ +exec autoexec.cfg” in the dialogue box that appears.
- Step 5: Click OK.
It’s done, now all your auto-execute CSGO settings will load automatically whenever you open CS GO.
Final Say!!
We hope that everything about Autoexec in CSGO is now clear to you. If there is anything else that you want to know about this topic, you can always let us know in the comment box. We try to make sure to provide accurate answers to valid questions. Your feedback is also important to us. Keep Reading & Keep Shooting!


